Duck legs are a wonderful choice when you want a rich, flavorful meal with a beautifully crisp exterior. Unlike leaner cuts of duck, the legs contain more fat and connective tissue, which makes them especially well suited to slow roasting. With the right cooking method, the meat becomes tender and juicy while the skin turns golden and crisp.
This easy guide explains how to cook duck legs with crispy skin using only a few basic ingredients. The process is simple: season the duck, slowly roast it to render the fat and tenderize the meat, then finish at a higher temperature to crisp the skin.
1. How To Cook Duck Legs With Crispy Skin (Yield: 4 Servings)
Ingredients
- 2 to 3 pounds duck legs
- Salt, to taste
- 2 tablespoons duck fat, butter, or lard
Instructions
Begin by preparing the duck legs. Remove them from their packaging and pat them thoroughly dry with paper towels. Dry skin is important because excess moisture can prevent it from becoming properly crisp during roasting.
Inspect the skin and trim away any large pieces of excess fat that hang loosely around the edges. Don’t remove all of the fat because it helps keep the meat moist and contributes to the rich flavor of the finished dish.
Place the duck legs skin-side up on a clean plate or baking sheet. Season both sides generously with salt, making sure the seasoning is distributed evenly.
For even better results, place the seasoned duck legs uncovered in the refrigerator for at least 4 hours, or preferably overnight. This dry-brining step seasons the meat more deeply while allowing the surface of the skin to dry further.
When you’re ready to cook, remove the duck legs from the refrigerator and let them sit at room temperature for about 20 to 30 minutes. This takes some of the chill off the meat and allows it to cook more evenly.
Preheat your oven to 325°F (163°C). Lightly grease a roasting pan or baking dish with the duck fat, butter, or lard.
Arrange the duck legs in the pan with the skin facing up. Make sure there is a little space between the pieces so hot air can circulate around them.
Place the pan in the preheated oven and roast the duck legs for approximately 1½ to 2 hours. The exact cooking time will depend on the size of the legs.
During the first stage of roasting, the duck fat will gradually render from the skin. As the fat collects in the bottom of the pan, carefully spoon some of it over the legs if desired. You can also remove excess rendered fat from the pan if there is a large amount, saving it for another recipe.
Continue roasting until the meat is very tender and the skin has become golden but is not yet as crisp as you want. Duck legs benefit from longer, slower cooking because the connective tissue needs time to soften.
Increase the oven temperature to 425°F (220°C). Continue roasting the duck legs for another 15 to 25 minutes, watching them carefully as the skin becomes increasingly golden and crisp.
If the skin needs additional browning, you can move the pan to a higher position in the oven for the final few minutes. Keep a close eye on it because the rendered fat can cause the skin to brown quickly.
Use an instant-read thermometer to check the thickest part of the meat without touching the bone. Duck should reach at least 165°F (74°C) for food safety. For especially tender duck legs, the meat may naturally reach a higher temperature during the longer roasting process.
Remove the duck legs from the oven once the skin is deeply golden and crisp and the meat is tender.
Transfer the duck legs to a wire rack or clean plate and let them rest for about 10 minutes before serving. Resting allows the juices to redistribute and makes the meat easier to eat.
If desired, carefully strain the rendered duck fat from the roasting pan and store it in the refrigerator for later cooking. Duck fat can add wonderful flavor to roasted potatoes and other dishes.
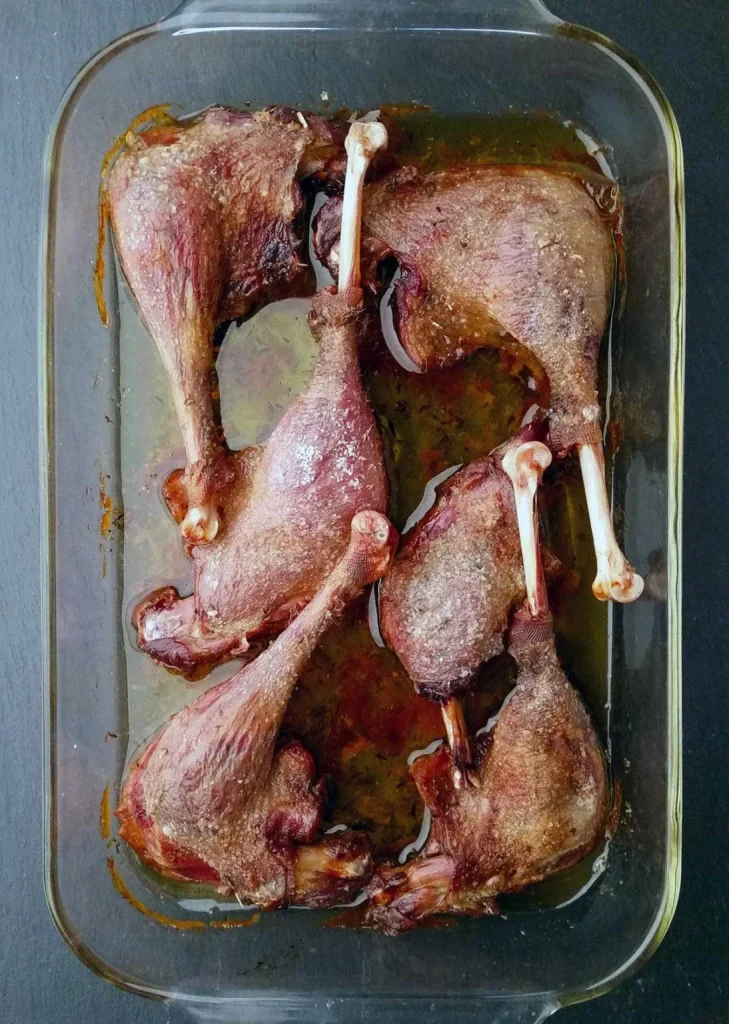
2. Tips for Perfect Roasted Duck Legs
Start with completely dry duck skin. Patting the legs thoroughly with paper towels is one of the simplest ways to improve browning and crispness.
Dry-brining the duck overnight is highly recommended. Salt draws some moisture from the surface while seasoning the meat, helping create a drier exterior that crisps beautifully in the oven.
Don’t cover the duck legs during roasting. Covering the pan traps steam, which can soften the skin instead of allowing it to become crisp.
Cook the duck slowly before increasing the temperature. The lower temperature gives the fat time to render and the connective tissue time to become tender.
Don’t throw away the rendered duck fat. Strain and refrigerate it in a clean container, then use it for roasting potatoes or sautéing vegetables.
Avoid adding a sugary glaze too early in the cooking process. Sugar can burn before the duck is fully cooked. If you want to add a glaze, use it near the end of roasting.
Give the duck enough resting time before serving. A short rest helps keep the meat juicy and makes the texture more enjoyable.
Use an instant-read thermometer rather than relying only on appearance. Duck legs can vary considerably in size, so temperature is a more reliable way to check doneness.
3. Frequently Asked Questions
Do duck legs need to be cooked differently from duck breast?
Yes. Duck legs contain more connective tissue and benefit from longer cooking at a moderate temperature. Duck breast is generally cooked more quickly because it is leaner and has a different texture.
Why is duck leg meat darker than chicken?
Duck legs contain muscles that are used frequently, which naturally gives the meat a darker color and richer flavor. This is a normal characteristic of duck and doesn’t indicate that the meat is undercooked.
Can I cook duck legs ahead of time?
Yes. Duck legs can be roasted ahead of time and refrigerated after they have cooled. Reheat them in a hot oven until heated through, finishing at a higher temperature to help restore crispness to the skin.
How should leftover duck legs be stored?
Allow the cooked duck to cool, then place it in an airtight container and refrigerate it within two hours. Properly refrigerated leftovers should be used within 3 to 4 days.
Can I freeze cooked duck legs?
Yes. Wrap the cooled duck legs well or place them in an airtight freezer-safe container. They can be frozen for up to several months. Thaw them in the refrigerator before reheating thoroughly.
4. Nutrition Information
The following nutrition values are approximate and based on one serving of roasted duck leg with skin.
| Nutrient | Amount Per Serving |
|---|---|
| Calories | 470 |
| Protein | 31 g |
| Carbohydrates | 0 g |
| Fat | 38 g |
| Saturated Fat | 12 g |
| Cholesterol | 190 mg |
| Fiber | 0 g |
| Sugar | 0 g |
| Sodium | 650 mg |
| Potassium | 280 mg |
| Calcium | 15 mg |
| Iron | 4 mg |
Cooking duck legs with crispy skin doesn’t require complicated ingredients or advanced techniques. The most important parts are keeping the skin dry, allowing enough time for the fat to render, and finishing the legs at a higher temperature to create that irresistible crisp exterior.
Once you learn How To Cook Duck Legs With Crispy Skin, this method becomes an easy way to prepare a rich and satisfying duck dish at home. Slow roasting develops tender meat and flavorful rendered fat, while the final high-heat step gives the skin its signature golden crunch.