If you’ve always wanted to bake a cake from scratch but felt intimidated, this guide is for you. A classic vanilla cake is one of the easiest and most rewarding cakes to master. It’s simple, fluffy, and delicious—perfect for birthdays, celebrations, or just a sweet treat at home. In this article, I’ll walk you through a detailed step-by-step recipe for a moist and fluffy vanilla cake, along with buttercream frosting.
1. Basic Vanilla Cake Recipe (Serves 10–12)
🧁 Ingredients
For the Vanilla Cake:
- 2 cups plain / all-purpose flour (you can also use cake flour)
- 2 ½ teaspoons baking powder (make sure it’s fresh and active)
- ¼ teaspoon cooking salt (kosher salt preferred)
- 4 large eggs (50–55g / 2 oz each), at room temperature
- 1 ½ cups caster sugar / superfine sugar (granulated sugar is fine too)
- 115g / ½ cup unsalted butter, cubed (about 1.5cm or ½” pieces)
- 1 cup full-fat milk
- 3 teaspoons vanilla extract (use high-quality for best flavor)
- 3 teaspoons vegetable or canola oil
For the Vanilla Buttercream Frosting:
- 225g / 2 sticks unsalted butter, softened
- 500g / 1 lb powdered sugar (sifted)
- 3 teaspoons vanilla extract
- 2–4 tablespoons milk (to adjust consistency)
Instructions
Step 1: Prepare Your Tools and Oven
Preheat your oven to 350°F (175°C).
Grease and line two 8-inch round cake pans with parchment paper. This prevents sticking and ensures an easy release.
Measure and prepare all ingredients before you start. Baking is precise, so accuracy matters.
Step 2: Mix the Dry Ingredients
In a large mixing bowl, sift together flour, baking powder, and salt.
Whisk them lightly to combine. This step removes lumps and ensures even distribution of the raising agent.
Step 3: Beat the Eggs and Sugar
In another bowl, use an electric mixer to beat the eggs and sugar on medium-high speed for 3–4 minutes.
The mixture should become pale, thick, and fluffy. This process incorporates air, giving the cake a light texture.
Step 4: Add the Butter and Vanilla
With the mixer on low speed, add the butter cubes one by one until fully incorporated.
Add the vanilla extract, mixing until smooth.
Step 5: Combine Wet and Dry Ingredients
Add half of the flour mixture to the egg mixture and mix on low speed. Next, pour in half of the milk and half of the oil, mixing gently.
Repeat with the remaining flour, milk, and oil. Mix until just combined—avoid over-mixing, which can make the cake dense.
Step 6: Bake the Cake
Divide the batter evenly between the two prepared pans then tap the pans lightly on the counter to release any air bubbles.
Bake in the preheated oven for 25–30 minutes, or until a toothpick inserted into the center comes out clean.
Remove the cakes from the oven and let them cool in the pans for 10 minutes, then transfer them to a wire rack to cool completely.
Step 7: Make the Vanilla Buttercream
In a large mixing bowl, beat the softened butter until creamy (about 2–3 minutes).
Next, gradually add the sifted icing sugar, mixing slowly to avoid clouds of sugar. Then add the vanilla extract and 2 tablespoons of milk. Continue beating until light and fluffy.
If the frosting is too thick, add more milk a teaspoon at a time until you reach the desired consistency.
Step 8: Assemble and Frost
Place one cooled cake layer on a serving plate. Spread a generous layer of buttercream on top.
Place the second cake layer on top, then frost the outside of the cake with the remaining buttercream.
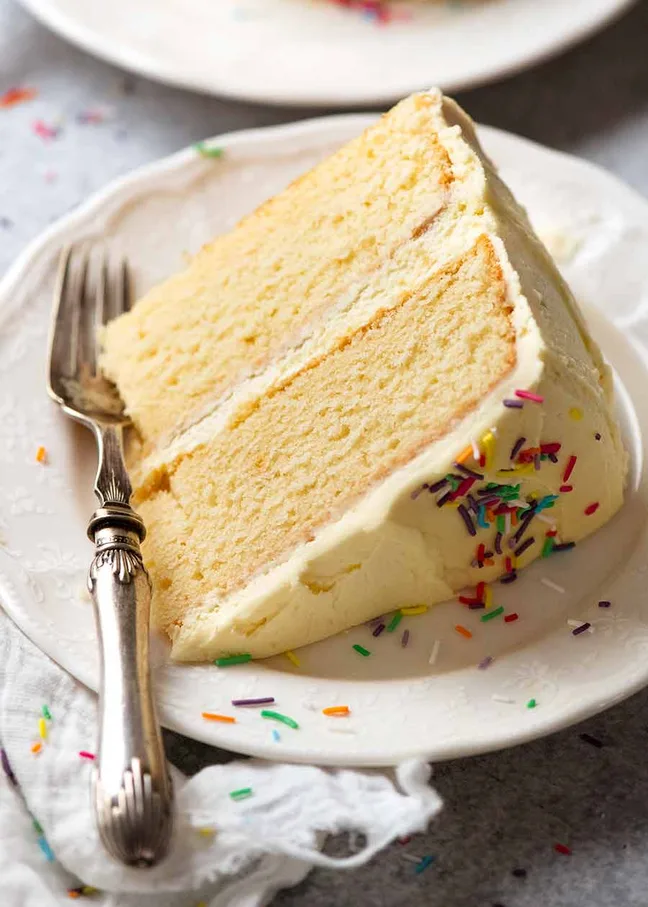
Smooth the edges with a spatula, or leave it rustic and swirly—both look beautiful!. Besides, you can also decorate with sprinkles, fruit, or even fresh flowers!
2. Tips for Perfect Homemade Vanilla Cake
Baking may seem tricky at first, but small details make a huge difference. Here are some useful tips:
Use room-temperature ingredients: Cold eggs or butter can make the batter curdle. Leave them out for 30 minutes before baking.
Measure accurately: Use kitchen scales for flour and butter. Too much flour can make the cake dry.
Check your baking powder: Old or expired baking powder won’t give your cake the rise it needs.
Don’t over-mix: Once flour is added, mix gently. Over-mixing develops gluten, making the cake tough.
Test doneness early: Start checking at 25 minutes. Every oven is different, so avoid overbaking.
Cool completely before frosting: Frosting a warm cake will melt the buttercream and create a mess.
3. Variations & Substitutes
One of the best things about this recipe is how versatile it is. You can tweak it to suit your taste or what you have on hand.
Lemon Vanilla Cake: Add 1 tablespoon of lemon zest to the batter for a fresh citrusy twist.
Chocolate Marble Cake: Swirl in 2 tablespoons of cocoa powder mixed with milk into half of the batter before baking.
Dairy-Free Option: Replace milk with almond, soy, or oat milk, and use vegan butter.
Healthier Swap: Substitute half the flour with whole wheat flour for a slightly denser, nuttier flavor.
Simple Glaze Instead of Buttercream: If you want something lighter, drizzle the cake with a vanilla glaze made of powdered sugar, milk, and vanilla extract.
Cupcake Version: Use the same batter to make about 24 cupcakes. Reduce baking time to 18–20 minutes.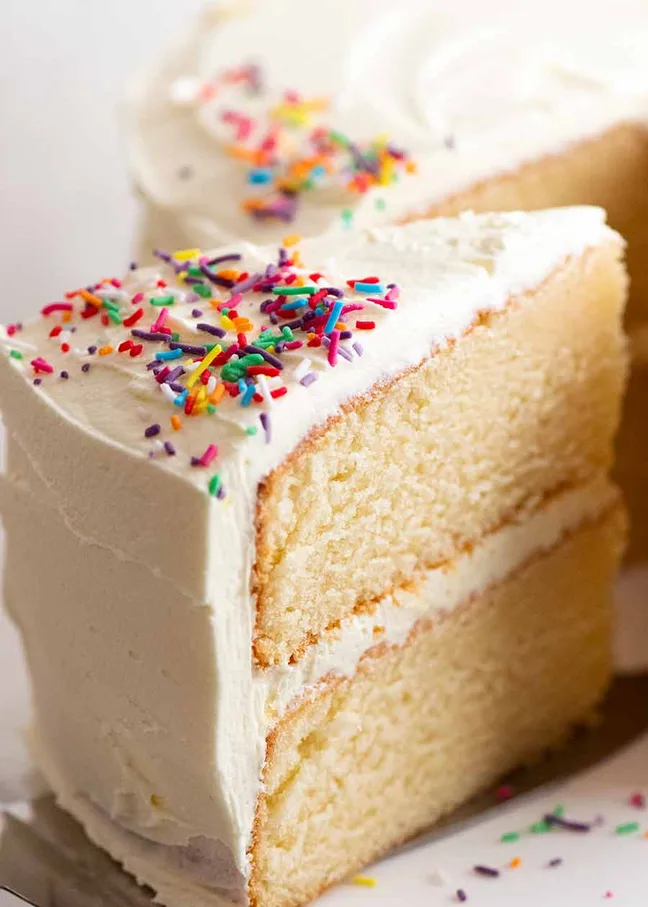
4. How to Store Leftover Vanilla Cake
Homemade cake rarely lasts long, but here’s how to keep it fresh:
At Room Temperature: Store the frosted cake in an airtight container for up to 2 days. Keep it in a cool, dry place.
In the Refrigerator: Cover with plastic wrap or place in a cake box. It will last for up to 5 days. Bring to room temperature before serving for the best texture.
Freezing: You can freeze unfrosted cake layers. Wrap each layer tightly in plastic wrap, then foil, and store in the freezer for up to 2 months. Thaw overnight in the fridge before frosting.
Buttercream Storage: Leftover buttercream can be refrigerated in an airtight container for up to 1 week, or frozen for 1 month. Whip again before using.
A basic vanilla cake is one of those essential recipes every home baker should have in their collection. It’s simple, versatile, and absolutely delicious. Once you’ve mastered this beginner-friendly version, you’ll feel more confident to try creative variations.