Canning is one of the most reliable and time-tested methods for preserving homemade jams, sauces, pickles, fruits, and vegetables. But before you begin filling jars with your delicious creations, there is one essential step you should never skip: boiling your jars.
Properly boiling and sterilizing canning jars ensures that no harmful microorganisms survive inside the container, keeping your preserved foods safe and shelf-stable for months or even years. Although this process sounds straightforward, it requires careful attention to detail to ensure the best results.
1. Why Boiling Canning Jars Matters
Boiling jars is more than a traditional step—it is a crucial food-safety measure. Jars that are not properly sterilized may introduce bacteria, mold, or spoilage organisms into your food. Since canned items are stored at room temperature for long periods, even a tiny amount of contamination can lead to spoilage or foodborne illness.
Boiling jars helps by:
-
Killing bacteria, yeasts, and molds that may be present on the glass surface.
-
Creating a sterile environment before food is added.
-
Preventing off-flavors and discoloration that can occur when contaminants are present.
-
Ensuring a proper vacuum seal once the jars cool.
For high-acid foods—such as jams, jellies, pickles, and tomato products—sterilizing jars by boiling is especially important because these items often undergo shorter processing times. For low-acid foods, additional pressure-canning steps are required, but pre-boiling the jars remains a smart practice for quality and safety.
2. What You Need Before You Begin
Before you start boiling jars, gather all your materials. This helps ensure a smooth and efficient canning process.
Equipment
-
Canning jars (Mason jars or Ball jars)
-
New lids (never reuse metal lids)
-
Screw bands/rings
-
Large stockpot or water-bath canner with a lid
-
Jar rack or a clean kitchen towel
-
Jar lifter or tongs
-
Clean dishcloths
-
Heat-resistant gloves (optional)
Ingredients
No ingredients are required for boiling the jars themselves—only clean water.
3. Step-by-Step Instructions: How to Boil Jars for Canning
Step 1: Inspect and Clean Your Jars
Start by examining each jar carefully. Look for cracks, chips, or rough edges around the rim. Even minor imperfections can prevent a proper seal or cause the jar to break during boiling.
Once inspected:
-
Wash jars, lids, and rings with warm, soapy water.
-
Rinse them thoroughly.
-
Allow jars to air-dry or use a clean towel.
Although they will be sterilized through boiling, starting with clean jars ensures no debris or residue interferes with the canning process.
Step 2: Prepare Your Canner or Large Pot
Select a pot large enough to allow water to cover the jars by at least 1–2 inches. If you have a water-bath canner, use the included jar rack. If using a regular pot, place a towel at the bottom to prevent jars from bouncing or touching each other directly—this reduces breakage.
Fill the pot about halfway with warm water. Using warm water prevents thermal shock, which can crack jars that are at room temperature.
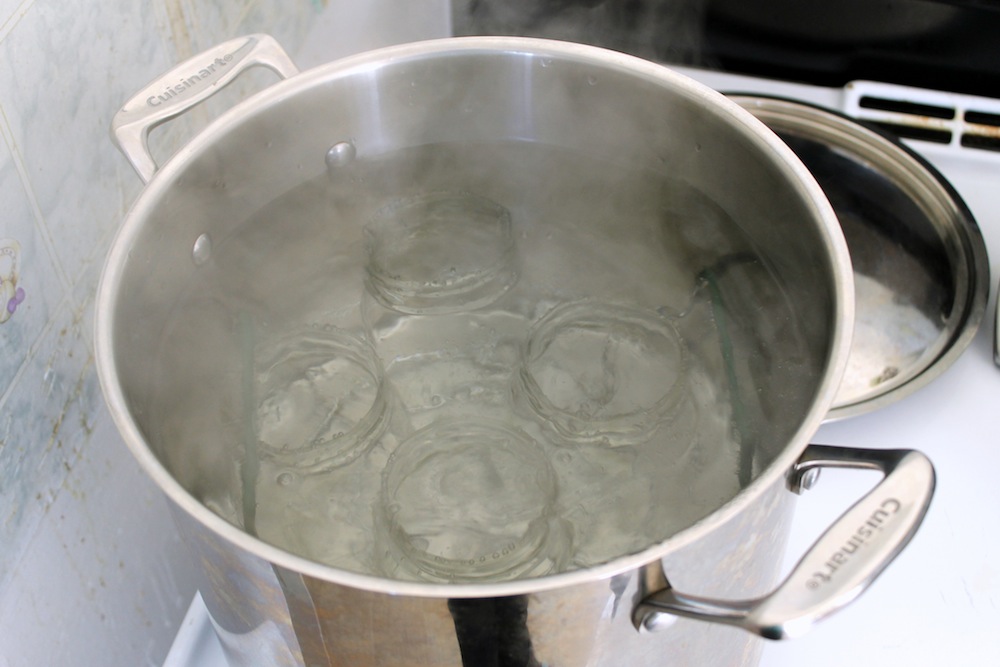
Step 3: Place the Jars into the Pot
Using a jar lifter or tongs, gently lower each jar into the pot upright. Do not place them on their sides or stack them.
Spacing the jars is important—leave enough room so water can circulate freely around each one.
If the jars are still cool, warm them up gradually by adding warm water around them instead of using hot water immediately.
Step 4: Add More Water to Cover the Jars
Once all jars are inside, add more water as needed. The water should cover the jars by at least 1 inch—2 inches is even better for consistent sterilization.
Cover the pot with a lid to help the water heat faster and more evenly.
Step 5: Bring the Water to a Full Rolling Boil
Turn the heat to high and bring the water to a rolling boil, not just a simmer. This ensures that the temperature reaches the point needed to kill microorganisms.
Once boiling, begin timing.
Step 6: Boil the Jars for 10 Minutes
For most canning projects, jars should be boiled for 10 minutes.
However, if you live at a higher elevation, add extra time:
-
1,000–3,000 ft: add 5 minutes
-
3,000–6,000 ft: add 10 minutes
-
Above 6,000 ft: add 15 minutes
Boiling the jars longer than necessary will not harm them; it simply ensures thorough sterilization.
Step 7: Keep the Jars Hot Until Use
Hot jars should be filled with hot food to prevent temperature shock. If your food is not yet ready, leave the jars in the pot of hot water. Reduce the heat so the water stays hot but does not boil vigorously.
This keeps the jars sterile and warm until you are ready to fill them.
Step 8: Remove the Jars Carefully
When it’s time to fill them:
-
Use a jar lifter to carefully remove each jar.
-
Place the jars upside-down on a clean towel or right-side up if filling immediately.
-
Avoid touching the inside rims to keep them sterile.
Do not place jars directly on a cold surface, as the sudden temperature change can cause cracking.
Step 9: Fill and Process the Jars According to Your Recipe
Once the jars are sterilized:
-
Fill them with hot food.
-
Wipe rims clean.
-
Apply the new lids and rings.
-
Process them in a water bath or pressure canner as required for your recipe.
Sterilizing jars first is especially essential when the final processing time is less than 10 minutes. When the recipe calls for a longer processing time, you still may sterilize jars for extra safety, but it is not required because the jars will sterilize during the long canning process.
Boiling jars for canning is a simple but essential step to ensure the success, safety, and shelf life of your preserved foods. By following proper sterilization techniques—cleaning jars, boiling them for the correct amount of time, keeping them hot until use, and handling them carefully—you set the foundation for high-quality homemade preserves. Whether you’re canning a batch of strawberry jam, crunchy pickles, or tomato sauce, boiled jars help ensure every jar seals perfectly and stays safe for long-term storage.