Warm, buttery, and loaded with melted cheese, Cheesy Garlic Bread is one of the easiest side dishes you can make at home. Crispy on the outside and soft on the inside, every slice is packed with savory garlic flavor and topped with a generous layer of gooey mozzarella and Parmesan.
This homemade recipe comes together in less than 30 minutes using simple pantry ingredients. The combination of butter, olive oil, garlic, and fresh parsley creates a rich, flavorful spread that soaks into the bread while baking. Finished with plenty of melted cheese, this Cheesy Garlic Bread is guaranteed to become a family favorite.
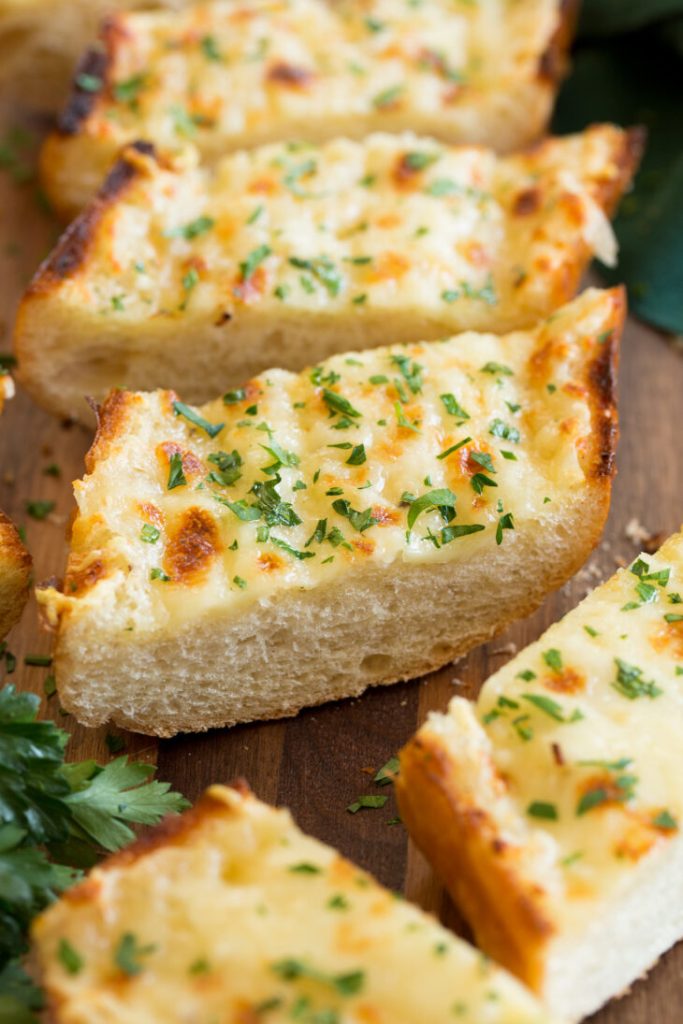
1. Cheesy Garlic Bread Recipe (Yield: 10 Servings)
Ingredients
- 1 (14-ounce) loaf French bread or Italian bread
- 1/4 cup salted butter, softened
- 2 tablespoons olive oil
- 2 teaspoons minced garlic, or 1 teaspoon granulated garlic
- Salt and freshly ground black pepper, to taste
- 1 1/4 cups shredded mozzarella cheese
- 1/3 cup finely shredded Parmesan cheese
- 1 tablespoon finely chopped fresh parsley
Instructions
Preheat the oven to 400°F (200°C). Line a large baking sheet with parchment paper or aluminum foil for easy cleanup.
Using a serrated bread knife, slice the loaf of French bread or Italian bread in half lengthwise. Place both halves cut-side up on the prepared baking sheet.
In a small mixing bowl, combine the softened butter, olive oil, minced garlic, a small pinch of salt, and several grinds of freshly cracked black pepper. Stir until the mixture is smooth and well blended. If using granulated garlic instead of fresh garlic, mix it thoroughly into the butter until evenly incorporated.
Spread the garlic butter mixture evenly over the cut surfaces of both bread halves. Use the back of a spoon or an offset spatula to spread it all the way to the edges so every bite is full of flavor.
Sprinkle the shredded mozzarella cheese evenly over both halves of the bread. Make sure the cheese covers the surface without piling it too thickly in one area, which helps it melt evenly.
Scatter the finely shredded Parmesan cheese over the mozzarella. The Parmesan adds a rich, nutty flavor and helps create a beautifully golden topping as the bread bakes.
Transfer the baking sheet to the preheated oven and bake for 10 to 12 minutes, or until the cheese is completely melted and bubbling and the edges of the bread begin to turn golden.
For a more golden, lightly browned cheese topping, switch the oven to the broil setting during the last 1 to 2 minutes of cooking. Watch the bread carefully during this step, as the cheese can brown very quickly.
Remove the baking sheet from the oven and immediately sprinkle the chopped fresh parsley over the hot cheese. The heat releases the parsley’s fresh aroma and adds a bright pop of color.
Allow the bread to cool for about 2 minutes before slicing. This brief resting time helps the melted cheese set slightly, making cleaner slices.
Using a serrated knife, cut each half into individual serving pieces. Serve immediately while the bread is warm, the cheese is stretchy, and the crust is crisp.
Cheesy Garlic Bread pairs wonderfully with spaghetti, lasagna, baked ziti, creamy Alfredo, tomato soup, minestrone, Caesar salad, grilled chicken, or roasted vegetables.
Store any leftovers in an airtight container in the refrigerator for up to three days. Reheat in a 350°F (175°C) oven or air fryer for several minutes until the bread is hot and the cheese is melted again. Avoid microwaving if possible, as it can soften the crust.

2. Tips for Perfect Cheesy Garlic Bread
Use a fresh bakery loaf with a firm crust and soft interior for the best texture after baking.
Let the butter soften completely before mixing so it combines easily with the olive oil and garlic.
Freshly minced garlic provides the boldest flavor, but granulated garlic is a convenient alternative that distributes evenly throughout the butter.
Shred the mozzarella yourself if possible. Freshly shredded cheese melts more smoothly than pre-shredded varieties that contain anti-caking agents.
Bake the bread until the cheese is fully melted before broiling. This prevents the top from browning too quickly while the cheese underneath finishes melting.
If serving a crowd, slice the bread after baking instead of before. This helps keep the cheese in place and the bread moist during baking.
For extra flavor, add a pinch of Italian seasoning or crushed red pepper flakes to the garlic butter mixture.
Serve the bread immediately after baking for the perfect combination of a crisp crust, soft center, and gooey melted cheese.
3. Frequently Asked Questions
Can I prepare Cheesy Garlic Bread ahead of time?
Yes. Assemble the bread with the garlic butter and cheese, cover it tightly, and refrigerate for up to 24 hours. Bake just before serving for the freshest results.
Can I freeze garlic bread?
Absolutely. Wrap the assembled, unbaked bread tightly in plastic wrap and aluminum foil, then freeze for up to three months. Bake directly from frozen, adding a few extra minutes to the baking time.
What other cheeses can I use?
Cheddar, provolone, Monterey Jack, fontina, Asiago, or a blend of Italian cheeses all work well and add different flavors and textures.
How can I make the bread crispier?
Bake the bread directly on the oven rack for the final few minutes or broil briefly after the cheese has melted. Keep a close eye on it to prevent burning.
What dishes go well with Cheesy Garlic Bread?
It pairs beautifully with pasta dishes, soups, stews, salads, grilled meats, roasted vegetables, and even serves as a delicious appetizer on its own.
4. Nutrition Information
| Nutrient | Amount Per Serving (Approx.) |
|---|---|
| Serving Size | 1 Slice |
| Calories | 235 |
| Total Fat | 11g |
| Saturated Fat | 5g |
| Cholesterol | 22mg |
| Sodium | 360mg |
| Carbohydrates | 24g |
| Sugar | 2g |
| Protein | 9g |
| Fiber | 1g |
| Calcium | 180mg |
| Iron | 1.4mg |
Cheesy Garlic Bread is a classic recipe that’s always a welcome addition to the table. With its crispy golden crust, rich garlic butter, and layers of melted mozzarella and Parmesan, it’s an easy homemade side dish that complements countless meals and is just as enjoyable on its own.
Simple ingredients and quick preparation make this recipe perfect for both weeknight dinners and special occasions. Once you’ve mastered this version, you’ll have a dependable recipe that’s sure to impress family and friends every time you serve it.