Bagels are one of the most beloved breads in the world—crusty on the outside, soft and chewy on the inside, and perfect for breakfast or brunch. This authentic bagel recipe delivers that classic texture and flavor you expect from a traditional New York-style bagel.
Made with simple pantry ingredients and a few key techniques, these homemade bagels are satisfying, delicious, and surprisingly easy to master. This step-by-step guide walks you through how to make chewy, golden bagels with perfect flavor and texture—just like the ones from your favorite bakery.
1. Authentic Bagel Recipe (Yield: Makes 8 Medium-Sized Bagels)
Ingredients
- 2 teaspoons / 6 g active dry yeast
- 4 ½ teaspoons / 19 g granulated sugar
- 1 ¼ cups / 300 ml warm water (you may need ± ¼ cup / 60 ml more)
- 3 ½ cups / 440 g bread flour or high-gluten flour (plus up to ½ cup / 60 g more for kneading)
- 1 ½ teaspoons / 6 g salt
- Optional Toppings: Caraway seeds, cinnamon sugar, coarse salt, minced garlic, minced onion, poppy seeds, sesame seeds, or everything bagel seasoning.
Instructions
Step 1: Activate the Yeast
In a small bowl, combine the warm water (105°F–115°F or 40°C–46°C), sugar, and active dry yeast. Stir gently and let it sit for about 5–10 minutes until the mixture becomes foamy. This means the yeast is alive and ready to use.
Step 2: Make the Dough
In a large mixing bowl, combine bread flour and salt. Pour in the yeast mixture and begin mixing with a wooden spoon or your hands until a rough dough forms. If the dough feels too dry, add a tablespoon of warm water at a time; if it’s too sticky, sprinkle in a little more flour.
Step 3: Knead the Dough
Transfer the dough onto a lightly floured surface. Knead for 8–10 minutes until it becomes smooth, elastic, and slightly firm. Proper kneading develops the gluten, which gives bagels their signature chewy texture. When you press your finger into the dough, it should spring back slowly.
Step 4: First Rise
Form the dough into a ball and place it in a lightly oiled bowl, turning it once to coat all sides. Cover the bowl with plastic wrap or a damp kitchen towel and let it rest in a warm place for 1 hour, or until the dough doubles in size.
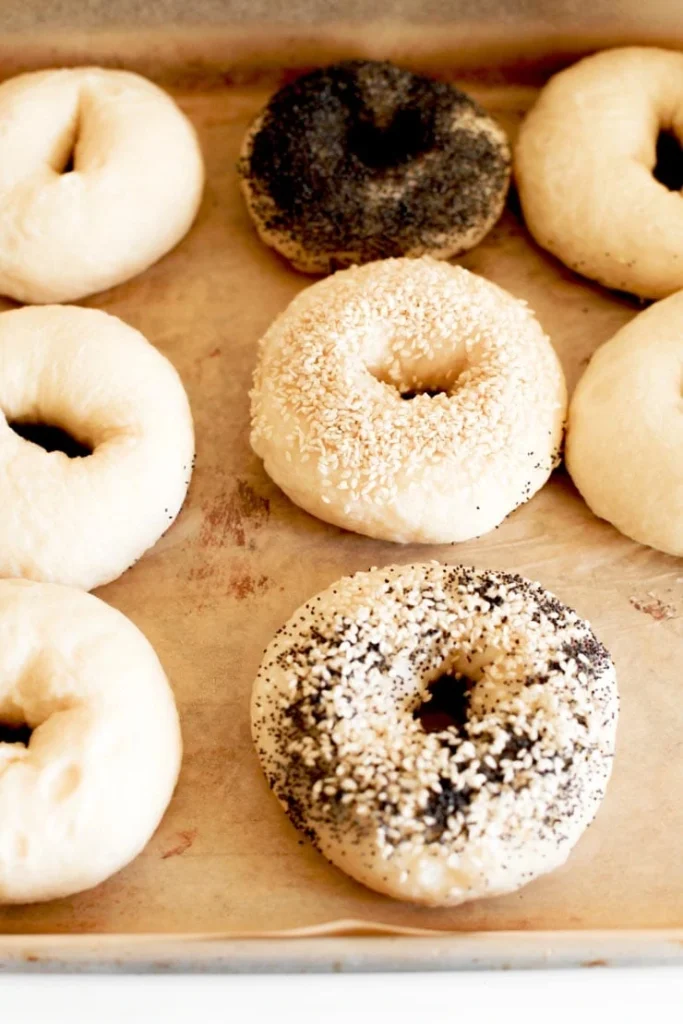
Step 5: Shape the Bagels
After the dough has risen, punch it down to release the air. Divide it into 8 equal pieces (about 100–110 g each). Shape each piece into a smooth ball by tucking the edges underneath.
To form the classic bagel shape, poke a hole in the center of each ball using your thumb, then gently stretch it into a ring about 2 inches (5 cm) in diameter. The hole will shrink during baking, so make it slightly larger than you think.
Step 6: Second Rise
Place the shaped bagels on a parchment-lined baking sheet. Cover them with a damp towel and let them rest for 10–15 minutes. They should puff up slightly.
Step 7: Boil the Bagels
Bring a large pot of water to a gentle boil. Add 1 tablespoon of sugar (optional) to enhance browning. Carefully drop 2–3 bagels at a time into the boiling water. Boil for 1 minute per side—this step gives bagels their chewy crust.
Remove with a slotted spoon and place them back on the baking sheet. Let excess water drain off before adding toppings.
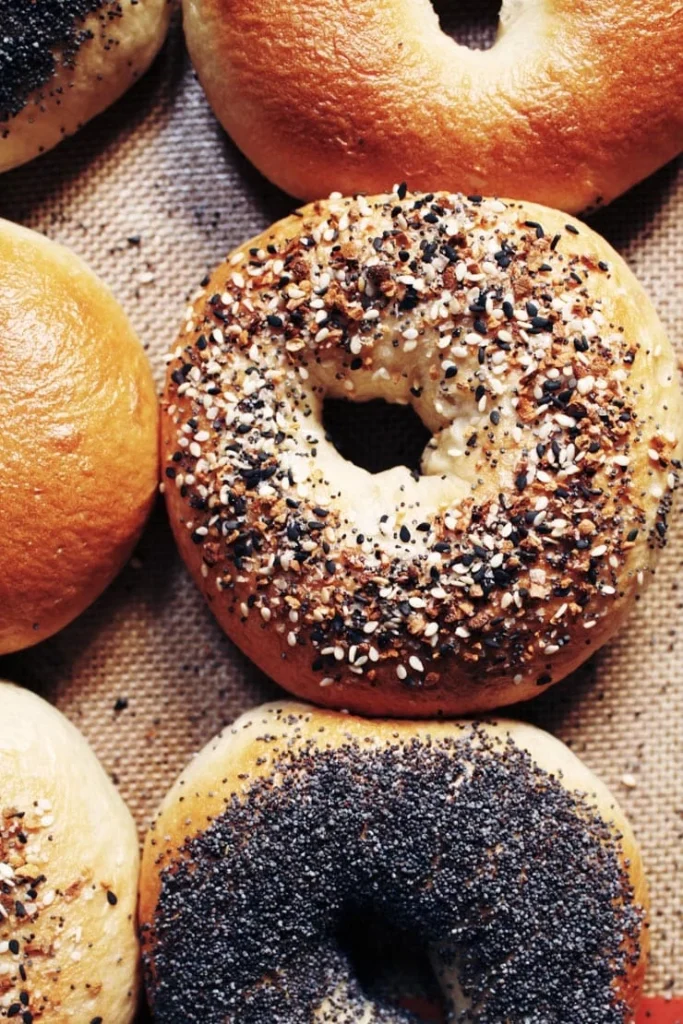
Step 8: Add Toppings
While the bagels are still slightly damp, sprinkle or dip them into your favorite toppings—sesame seeds, poppy seeds, minced onions, or everything bagel seasoning are all great options.
Step 9: Bake the Bagels
Preheat your oven to 425°F (220°C). Bake the bagels for 20–25 minutes, or until they’re golden brown. For an extra-crispy crust, flip them halfway through baking.
Transfer to a wire rack to cool completely before slicing.

2. Tips for Perfect Homemade Bagels
Use High-Gluten or Bread Flour:
The higher protein content in bread flour creates more gluten, which gives bagels their chewy texture. Avoid using all-purpose flour—it makes softer bagels.
Don’t Skip the Boiling Step:
Boiling gelatinizes the starches on the surface, helping the bagels develop a crisp crust and a shiny finish. For softer bagels, boil for 30 seconds per side; for chewier ones, boil for 1½ minutes.
Control the Dough Hydration:
Bagel dough should be firm, not sticky. Add flour gradually until it holds its shape but remains pliable.
Resting Time Matters:
Allowing the dough to rise fully develops flavor and texture. If you have time, refrigerate the shaped bagels overnight before boiling—they’ll taste richer and bake up beautifully.
Use Steam or Ice Cubes:
For an even crispier crust, place a few ice cubes in a hot tray on the oven floor when you start baking to create steam.
3. Frequently Asked Questions
Q1: Can I make bagels without boiling them?
Boiling is essential for authentic texture. Skipping this step will result in bread rolls, not real bagels. However, if you’re short on time, you can brush them with hot water mixed with a little baking soda before baking.
Q2: How can I make flavored bagels like cinnamon raisin or cheese bagels?
For cinnamon raisin bagels, add 1 teaspoon cinnamon and ½ cup raisins to the dough before kneading. For cheese bagels, top with shredded cheddar or mozzarella before baking.
Q3: Can I freeze homemade bagels?
Yes! Slice and freeze them in an airtight bag for up to 3 months. Toast directly from frozen for best results.
Q4: Why did my bagels turn out flat?
Flat bagels usually mean the dough was overproofed or the yeast wasn’t active. Always check that your yeast foams properly before mixing.
Q5: How do I get a glossy, professional-looking crust?
Make sure your bagels are boiled in slightly sweetened water and bake them in a preheated oven. You can also brush them with an egg wash for extra shine.
4. Nutrition Information
| Nutrient | Per 1 Medium Bagel (Plain) |
|---|---|
| Calories | 250 kcal |
| Total Fat | 1.5 g |
| Saturated Fat | 0.2 g |
| Cholesterol | 0 mg |
| Sodium | 290 mg |
| Total Carbohydrates | 52 g |
| Dietary Fiber | 2 g |
| Sugars | 5 g |
| Protein | 9 g |
Making bagels at home is a rewarding experience that transforms a handful of simple ingredients into golden, chewy perfection. From the first knead to the final bake, every step adds to the flavor and texture that make authentic bagels so special.
Once you try this authentic bagel recipe, you’ll see just how easy and satisfying homemade bagels can be—and you’ll never want to go back to store-bought again.
