There’s something truly special about baking your own bread from scratch. The warm scent, the golden crust, and the soft, tender crumb take you back to simpler times — when bread was made with love, not preservatives.
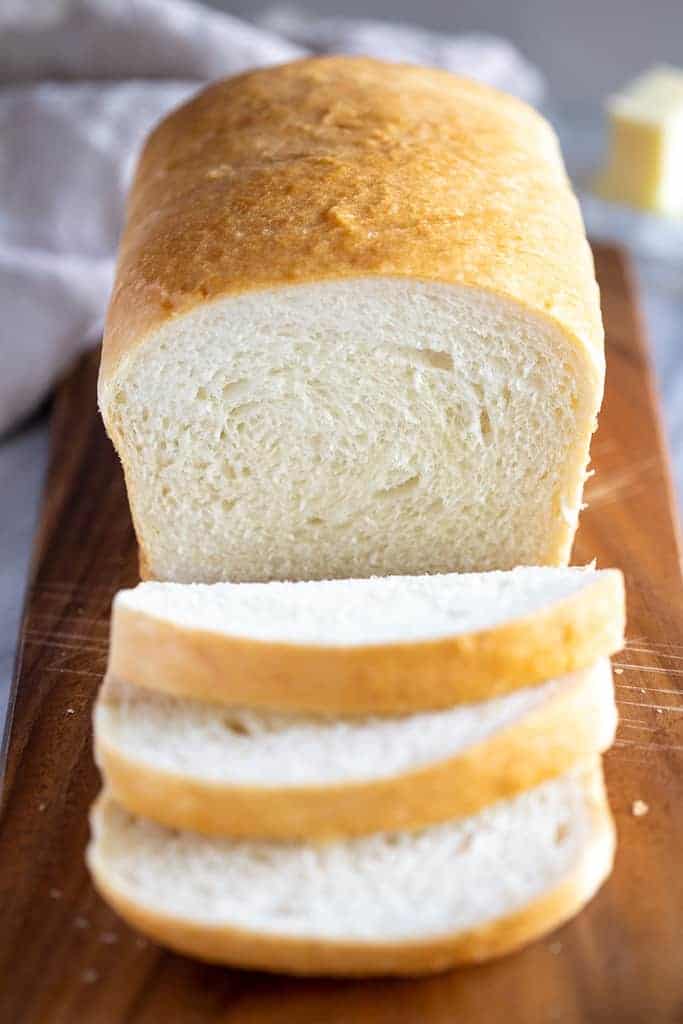
This Old Fashioned Homemade Bread Recipe is a timeless favorite that delivers the perfect classic white loaf. It’s soft, slightly sweet, and perfect for sandwiches, toast, or just warm with butter.
1. Old Fashioned Homemade Bread Recipe
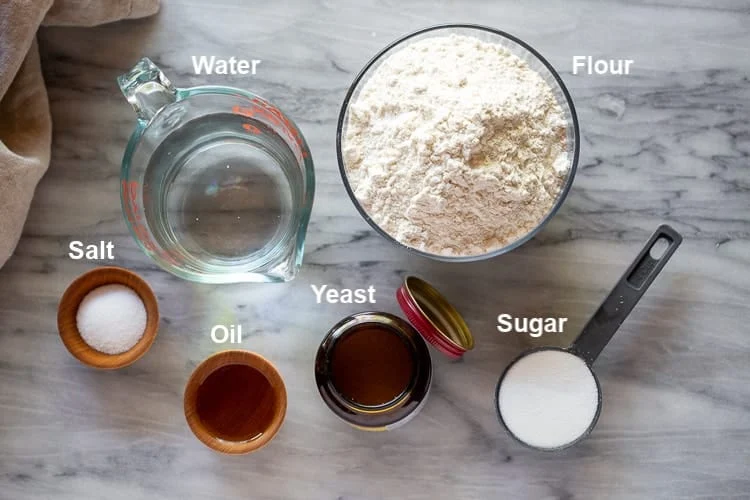
Ingredients
- 2 cups warm water (105–115°F / 474g)
- 1 tablespoon active dry yeast
- ¼ cup honey or sugar (85g honey or 50g sugar)
- 2 teaspoons salt
- 2 tablespoons canola or vegetable oil (30ml)
- 4–5½ cups all-purpose or bread flour (500g–688g)
Equipment Needed
- Large mixing bowl or Bosch mixer (or stand mixer with dough hook)
- Wooden spoon or dough hook attachment
- Loaf pans (2 standard 8×4-inch pans)
- Clean kitchen towel or plastic wrap
- Wire cooling rack
Instructions
Step 1: Activate the Yeast
In a large mixing bowl, combine warm water (make sure it’s between 105–115°F / 40–46°C) and honey (or sugar). Stir until the sweetener dissolves, then sprinkle the yeast over the surface of the water. Let it sit for about 5–10 minutes, or until the mixture becomes frothy and bubbly. This step ensures that your yeast is alive and ready to leaven the dough.
If the yeast doesn’t foam, your water may have been too hot or too cold. Start again with fresh yeast.
Step 2: Mix the Dough
Once the yeast mixture is bubbly, add the oil and salt. Gradually stir in 2 cups of flour using a wooden spoon or the dough hook on your Bosch mixer. Continue adding flour, one cup at a time, until the dough begins to pull away from the sides of the bowl and is no longer sticky.
You’ll need between 4 and 5½ cups of flour, depending on the humidity and your flour type. The dough should be soft and smooth but not tacky.
Step 3: Knead the Dough
Kneading helps develop gluten, which gives the bread its structure and chewiness.
- If kneading by hand: Turn the dough onto a lightly floured surface and knead for about 8–10 minutes, pushing the dough with the heel of your hand, folding it over, and turning it a quarter turn.
- If using a Bosch mixer: Knead on low to medium speed for 5–6 minutes until the dough becomes elastic and smooth.
The dough is ready when you can stretch it between your fingers without tearing — this is known as the “windowpane test.”
Step 4: First Rise (Proofing)
Lightly oil a clean bowl and place the dough inside, turning once to coat the top with oil. Cover the bowl with a damp kitchen towel or plastic wrap. Let the dough rise in a warm, draft-free area for about 1 to 1½ hours, or until it has doubled in size.
If your kitchen is cool, place the bowl inside an unheated oven with just the oven light on — it creates the perfect warm environment for rising.
Step 5: Shape the Loaves
Once the dough has doubled, punch it down gently to release air bubbles. Divide the dough into two equal portions. On a lightly floured surface, shape each portion into a loaf by flattening it into a rectangle and rolling it tightly into a log. Pinch the seams closed and tuck the ends under.
Place each loaf seam-side down into a greased loaf pan.
Step 6: Second Rise
Cover the pans with a towel and let the dough rise again for 30–45 minutes, or until it has risen about 1 inch above the top edge of the pan. Avoid over-proofing, as it can cause the loaves to collapse during baking.
Step 7: Bake the Bread
Preheat your oven to 375°F (190°C). Bake the loaves for 25–30 minutes, or until they’re golden brown and sound hollow when tapped on the bottom.
For a soft crust, brush the tops with melted butter immediately after removing from the oven. Transfer to a wire rack to cool completely before slicing.
Step 8: Serve and Store
Allow your bread to cool for at least 30 minutes before slicing to prevent it from becoming gummy inside.
Store at room temperature in a bread box or airtight container for up to 4 days, or freeze for up to 3 months.
2. Tips for Perfect Old Fashioned Homemade Bread
Check your yeast freshness: Expired or inactive yeast won’t rise properly. Always check the expiration date and proof it in warm water before mixing.
Mind your water temperature: Too hot kills the yeast; too cold slows fermentation. Aim for 105–115°F.
Don’t add too much flour: Add flour gradually until the dough is soft but not sticky. Over-flouring results in dense bread.
Let it rise properly: Patience pays off! Let the dough double in size each time for the best texture.
Use bread flour for more chew: Bread flour has higher protein content, giving your loaf a slightly stronger structure and chewy texture.
Cool before slicing: Cutting hot bread releases steam, making it gummy. Always cool completely before slicing for clean cuts.
3. Frequently Asked Questions
Can I use instant yeast instead of active dry yeast?
Yes. You can substitute instant yeast 1:1 for active dry yeast. Skip the proofing step and mix it directly into the flour, though you’ll still need warm liquid for activation.
How can I make this bread softer?
For a softer loaf, use milk instead of water and add 1 tablespoon of butter along with the oil. Brushing the crust with butter after baking also helps.
Can I knead the dough without a mixer?
Absolutely! Kneading by hand gives you more control and helps you “feel” the dough’s texture. Just be prepared for a 10-minute arm workout.
Why did my bread turn out dense or heavy?
Common reasons include using too much flour, not letting the dough rise enough, or old yeast. Be sure to measure accurately and allow proper proofing time.
How can I store homemade bread?
Wrap it in plastic wrap or store in a bread box. Avoid the refrigerator—it dries out the loaf faster. For long-term storage, freeze it in airtight bags.

4. Nutrition Information
| Nutrient | Per Serving (1 slice) |
|---|---|
| Calories | 120 kcal |
| Carbohydrates | 22 g |
| Protein | 3 g |
| Fat | 2 g |
| Saturated Fat | 0.3 g |
| Cholesterol | 0 mg |
| Sodium | 195 mg |
| Fiber | 1 g |
| Sugar | 2 g |
Baking bread the old-fashioned way is more than just cooking — it’s an experience that connects you to tradition. With just a few simple ingredients and some patience, you can create homemade loaves that taste far better than anything from the store.
Once you master this Old Fashioned Homemade Bread Recipe, it’ll become a staple in your kitchen — perfect for sandwiches, morning toast, or just enjoying fresh with butter and jam.
There’s nothing quite like the comfort of warm, homemade bread shared with family and friends. So roll up your sleeves, preheat your oven, and start baking the kind of bread that never goes out of style.